

|
|||||||||
| Take Your Photography to the Next Dimension | |
| 3D Woodworking, a Tutorial | |
| How to make 3D Images in Photoshop (Anaglyphic) | |
| Have you ever felt that your photographs just don't capture the shape and curves of your work? Wouldn't it be nice to be able to present your work to your clients and fans with greater depth? Well you can. And the idea isn't new. It's called anaglyphic photography and according to wiki (it's never wrong, right?) it dates back to 1853. The principle involves showing two images with a specific color, slightly off-set, while blocking/filtering one of the images from view from only one eye. Movie theaters use the same principle today only they use a special screen, special polarized light and polarized lenses in the glasses. Anyway, we can do something similar using the jig shown below. You take one photo and slide the camera one way or the other and take a second picture. The two images can be manipulated in Adobe Photoshop or other imaging software to adjust the left and right images to either blue or red. If your audience is wearing blue/red glasses the effect is pretty awesome if done correctly. The jig that you need for the two required images is essentially a sliding dovetail with the camera attached. The bolt only goes through the dovetail and the bolt is free to slide in the dovetailed groove. The bolt is also counter sunk. |
|
| The Jig: | |
| (Click small images below to enlarge) |  |
 |
|
 |
|
| The Software: | |
| See a few 3D Pictures I've taken | |
| About | Contact | FAQ | Privacy | Disclaimer |
Copyright © 2006-2025 Garage Woodworks |
||||
If you have Adobe Photoshop here is the process on the software side. Here is how I do it:
Open up the ‘right eye’ image.
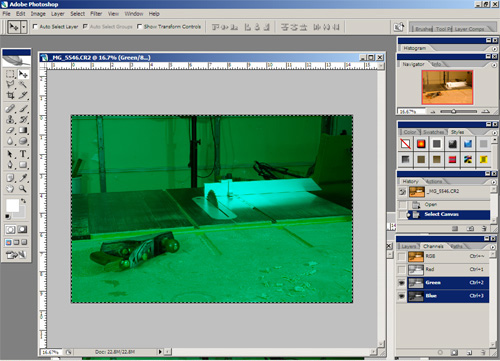
Highlight only the blue and green channels in the lower right and select the entire image. Copy it and paste it into a new image (File → New → Paste).
Your new image should look like this:

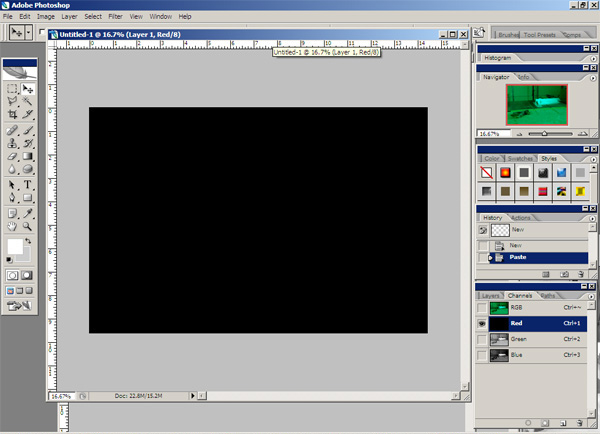
Select the empty red channel. It should look like this now:
Go to the left eye image and select only the red channel in the lower right.
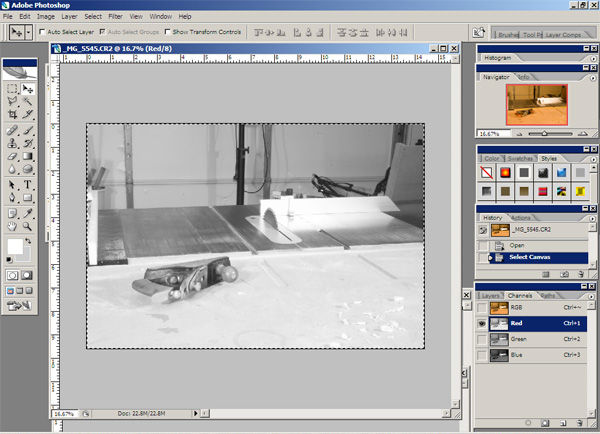
Sect the entire image and copy it into the empty red channel (Select → All →Copy). It should look like this now:
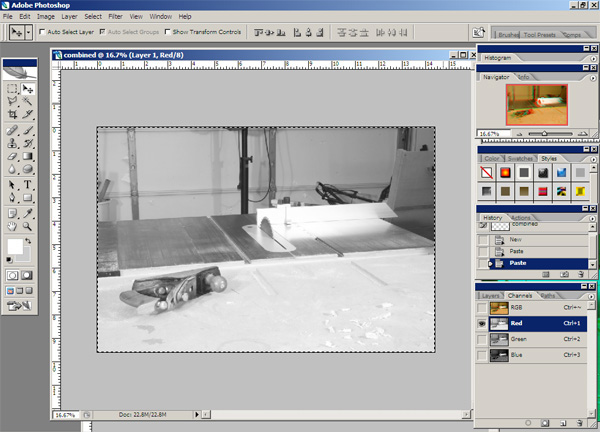
Now click on the RGB to make all of the channels active and you should see a 3D image.
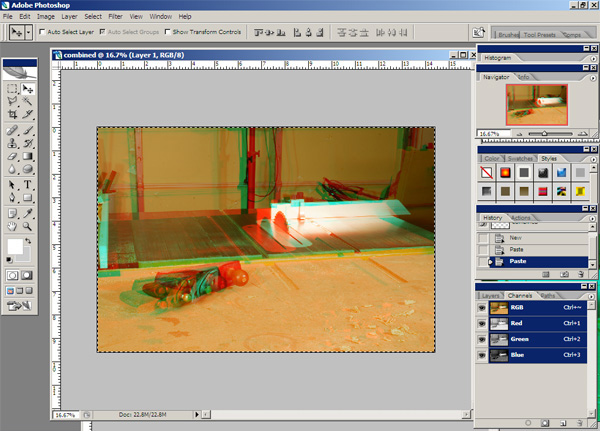
Now all you have to do is click on the red channel and the ‘eye ball’ to the left of the RGB channel. Move the red channel around with the Move tool until the alignment looks good (with your 3D glasses on).
I hope this makes sense. If not don’t hesitate to ask me questions.